How to sync local Active Directory to Office 365 with DirSync
When moving to the Office 365 environment quite commonly the old on-premises structure must be preserved. Sometimes it is because the migration process can take quite a bit of time to finish, sometimes because the company wants to follow the hybrid scenario, when both environments are used.
No matter the reason, one of the important aspects of the coexistence setup is synchronization of Active Directory between local and Cloud Exchange. The article below describes steps required to achieve such a sync.
Directory Synchronization Tool
To sync the local AD with the Office 365 service the installation of the Directory Synchronization Tool (Dirsync) is required. You can download the tool from Microsoft pages: http://go.microsoft.com/fwlink/?LinkID=278924. Bear in mind that the tool is available only in a 64 bit version.
The program syncs all accounts, with their access passwords up to Office 365. However, it does not provide Single Sign-On (SSO) capability. To achieve SSO AD Federation Services (ADFS) needs to be configured.
Microsoft recommends installing Dirsync on a server within a domain, however, it should not be a domain controller. More specific system requirements are available on this Microsoft Technet website: http://technet.microsoft.com/en-us/library/jj151831.aspx#BKMK_ComputerRequirements.
Installation
NOTE: all actions below are performed on a test Office 365 environment.
Steps are as follows:
-
-
- Log in to Office 365 with administrative user credentials.
- Go to Users, then Active Users.
- Click the Active Directory synchronization Set up link visible above the list of users.
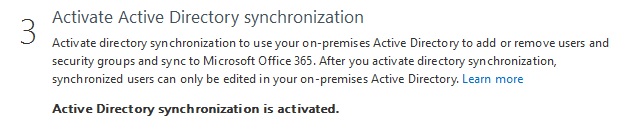
- In point „3” on the list click the Activate button. A notification should appear that the synchronization is active:
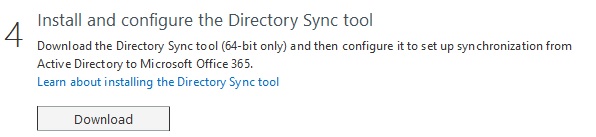
- In point „4” click Download to get the Dirsync tool:
- On the machine, where you are installing the tool make sure that the .net 3.5 sp1 and .net 4.0 libraries are installed. Otherwise the Dirsync tool setup will return the following error:
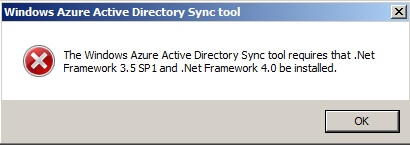
In Windows Server 2008 R2 SP1 the .net 3.5 SP1 library is available for installation via the Server Manager program, in the Features tab, while the .net 4.0 needs to be downloaded from the following location: http://www.microsoft.com/en-US/download/details.aspx?id=17718.In Windows Server 2012 and 2012 R2 both libraries can be installed using the Server Manager console. - Follow the installation wizard until finish. The process might take a couple of minutes.
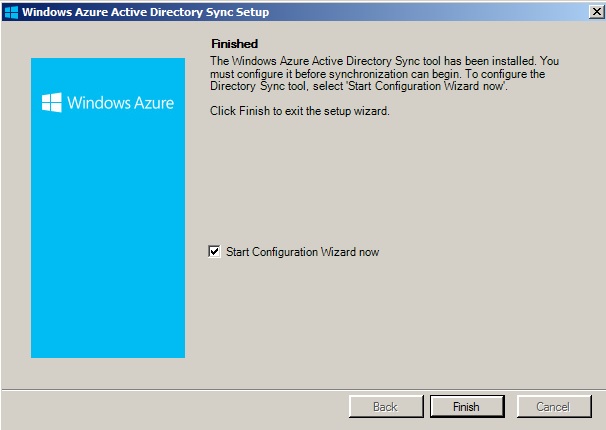
- Once the installation is complete select Start Configuration Wizard now and click Finish.
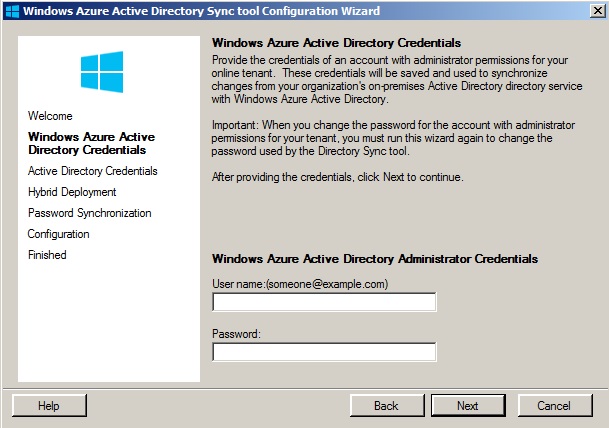
- In the configuration wizard, enter credentials of a user with administrative privileges in Office 365. These credentials are stored within the tool – if they change (e.g. the password is changed) the program needs to be reconfigured.
- In the next step enter administrative user credentials of the on-premises AD. Opposite to step 9., these credentials are not stored, and there is no need to reconfigure the program if e.g. the password changes.
- Next step shows the Exchange settings for the hybrid deployment. Leave them unchecked, as they are not covered in this article. Click Next.
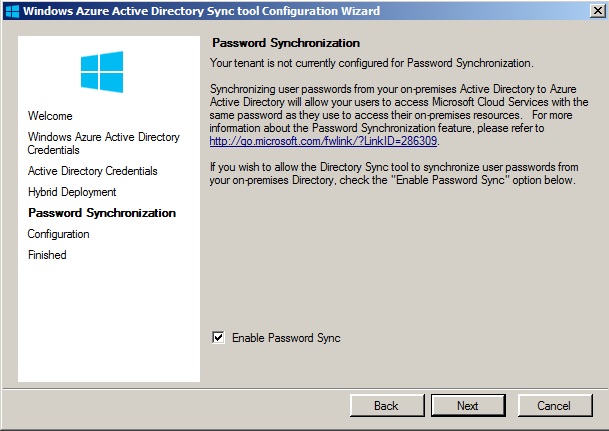
- In the following step, mark the Enable Password Sync checkbox. Click the Next button.
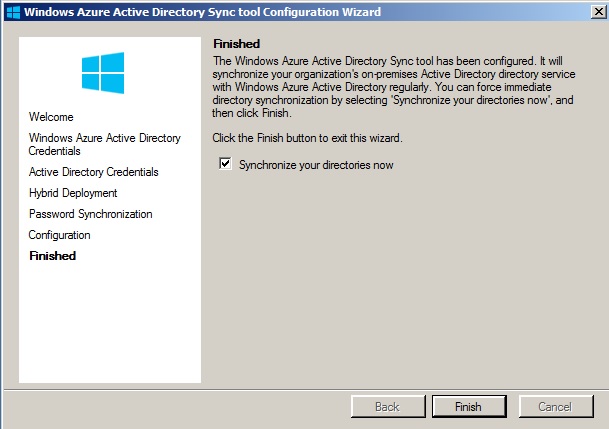
- Wait for the program to finish configuration. Once it’s done – click the Finish button. Leave the Synchronize your directories now option marked:
-
Synchronization monitoring
After Dirsync is installed, you need to verify that the process works as expected. To do so use the Synchronization Service Manager console:
-
-
- Go to the following disk location: C:\Program Files\Windows Azure Active Directory Sync\SYNCBUS\Synchronization Service\UIShell.
- Launch the miisclient.exe program. It might happen that the program will not start, right after Dirsync installation. In such situation simply log out and then log back on to the system.
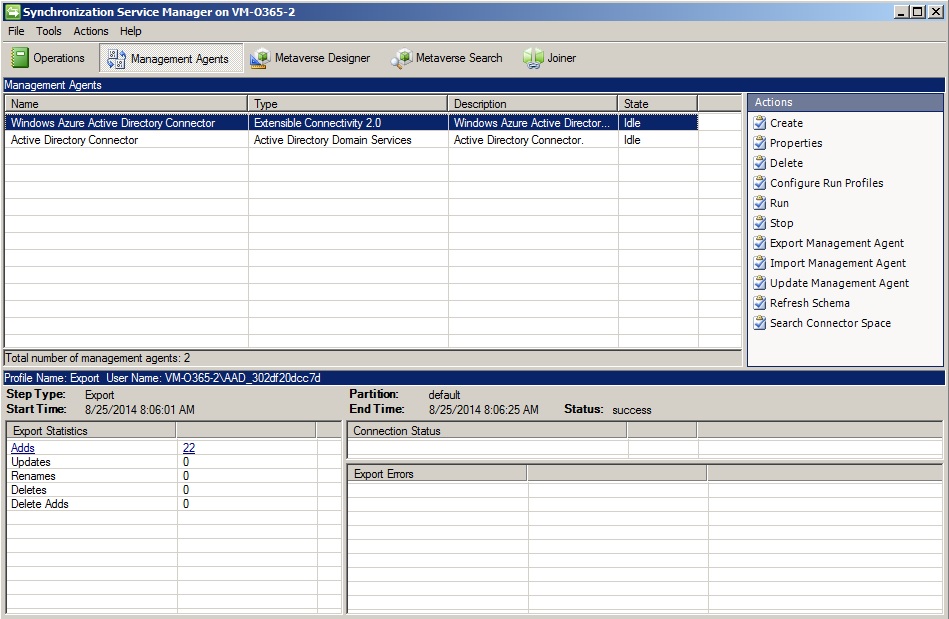
- Once the program is running you can check the sync progress:
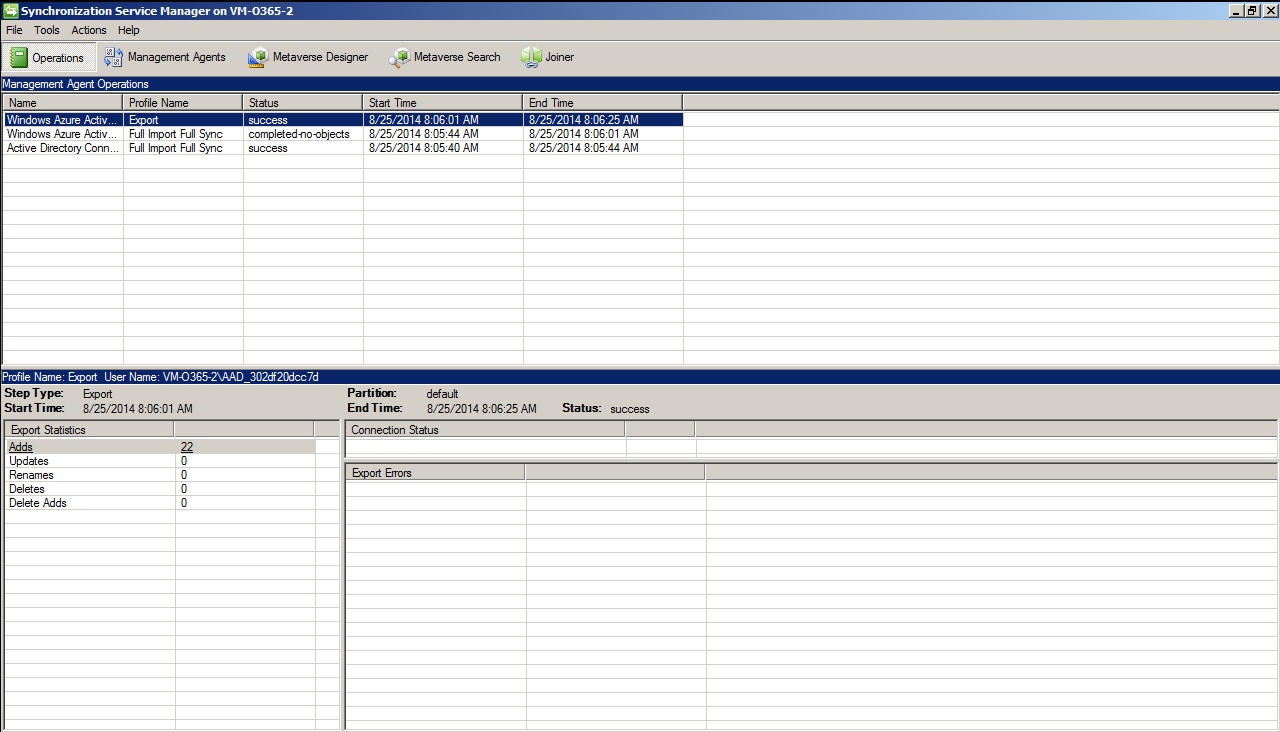
-
In the upper part of the window, there is a list of all current sync cycles. In lower left all current modifications to AD are listed.
-
-
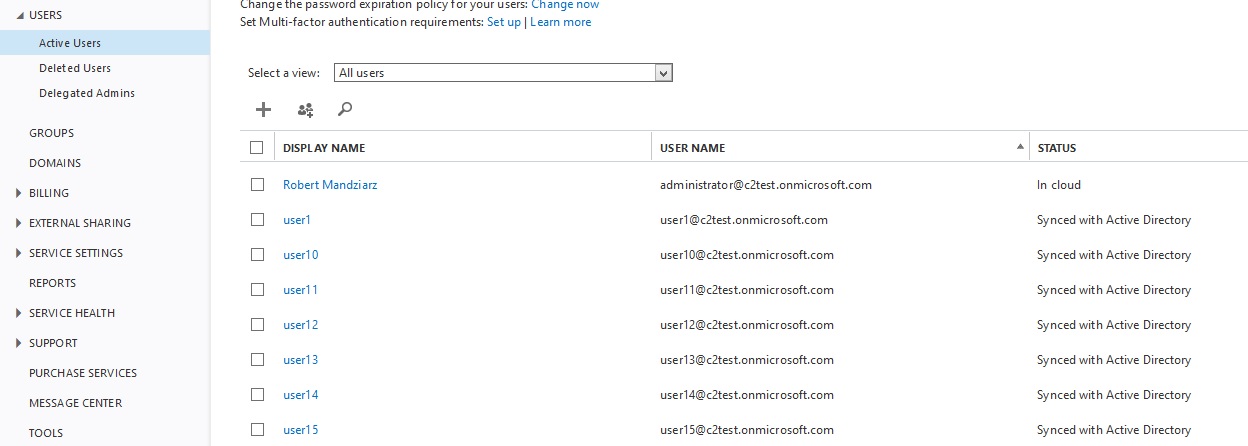
- Log on to the Office 365 portal again.
- In the Users section, in Active Users part you can check which accounts are already synced:
-
Dirsync post-installation tweaks
Changing time between sync cycles
By default, the sync cycles are launched in 3-hour intervals. To reduce the time between syncs (e.g. for testing purposes) do the following:
-
-
- On the server, where the Dirsync tool is installed go to the C:\Program Files\Windows Azure Active Directory Sync folder.
- Open the Microsoft.Online.DirSync.Scheduler.exe.Config file with the Notepad.
- Locate the following string:<add key=”SyncTimeInterval” value=”3:0:0″ />and change the “3:0:0” value to e.g. “0:5:0”. This changes the sync interval from 3 hours to 5 minutes.
- Save changes in the file and restart the Windows Azure Active Directory Sync Service in system services.
-
Limiting the number of synced objects
In situations, when the on-premises organization is large, and only some users or groups are using Office 365 it is useful to limit the sync to specific Organizational Units (OU) only.
-
-
- On the Dirsync server open the C:\Program Files\Windows Azure Active Directory Sync\SYNCBUS\Synchronization Service\UIShell location.
- Open the Synchronization Service Manager console by launching miisclient.exe.
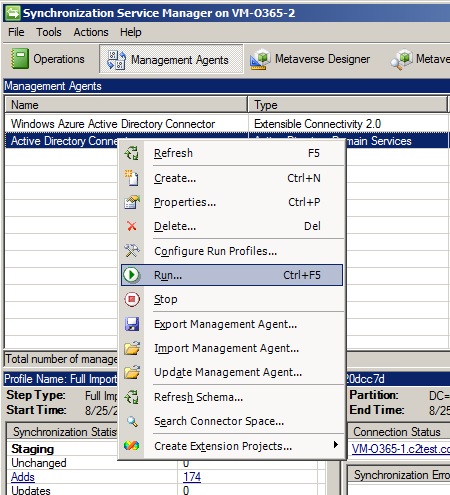
- Open the Management Agents tab:
- Right-click Active Directory Connector and select Properties.
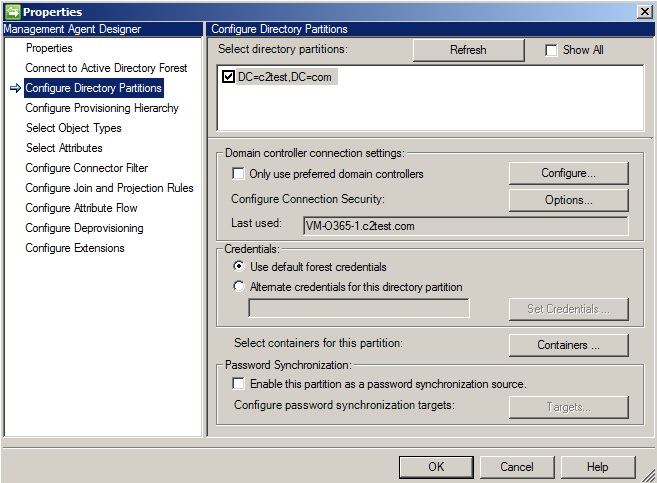
- Navigate to Configure Directory Partitions and click the Containers button:
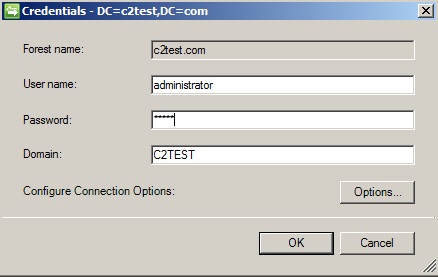
- In the next window enter credentials of the AD administrative user:
- Select the OU container of your choice and click OK:

- Click OK again to return to the main window (Management Agents tab).
- Right-click the Active Directory Connector agent and click Run:
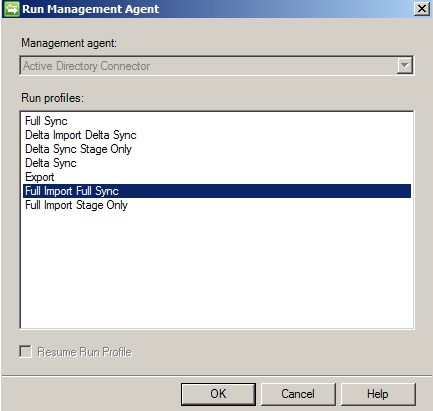
- Select Full Import Full Sync and hit OK:
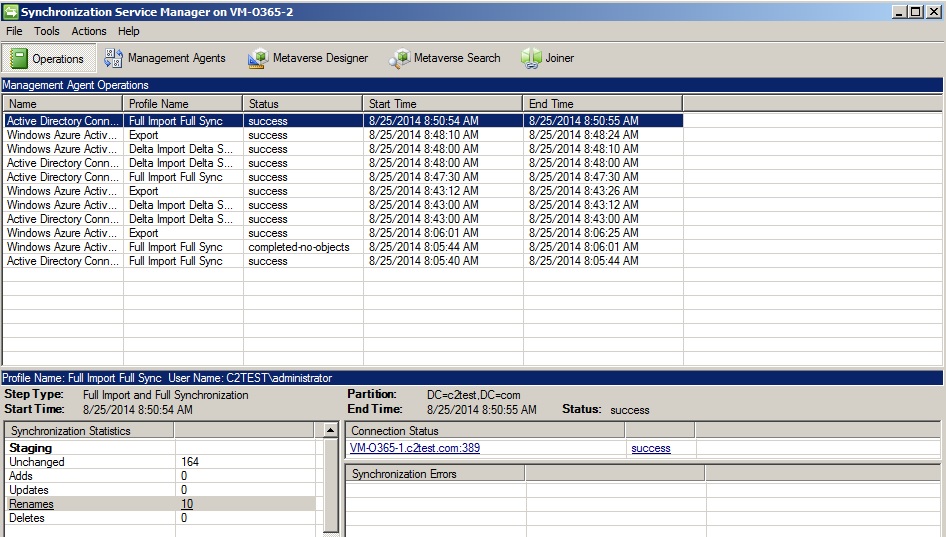
- You should already notice the effect of above settings in the main program window, in the Operations tab:
-
That’s it – you have now a fully synced AD with Office 365. Every change to any Active Directory object is now synchronized to the Cloud.